Showing posts with label pattern. Show all posts
Showing posts with label pattern. Show all posts
Tuesday, April 5, 2011
Second Dress -- Completed
Pleased to announce that my dress is complete! It only took me a week - and with another mail order pattern, this is very exciting progress. The weather is not allowing for nice pictures outside, so hopefully soon I will be able to get a few photos. Also, I need to get some photos of my clothes for the 30 for 30 challenge. I probably won't start it until this coming Monday. There are quite a few projects going on . . . .

Wednesday, March 30, 2011
Second Dress Project - Lace
I have been in the sewing mood since I made my first vintage dress a few weeks ago. Since, I have made three skirts, from a 1981 pattern, very simple and darling! Spring is soon coming, and I have been in the mood for dresses. My closet is dress-sparse, so I thought another dress on the hanger would suit just fine.
The dress I made for Casey's Swing Dress Sew along turned out so well, I thought I would make another dress. This one is from the mid-40s with almost the same styling, without the buttons. I made an unexpected trip to Joann's the other day, and found some very nice avocado swingy polyester blend fabric. Joann's was having a huge sale, and I bought all of the avocado green they had, and still have some left over to make a skirt if I want!
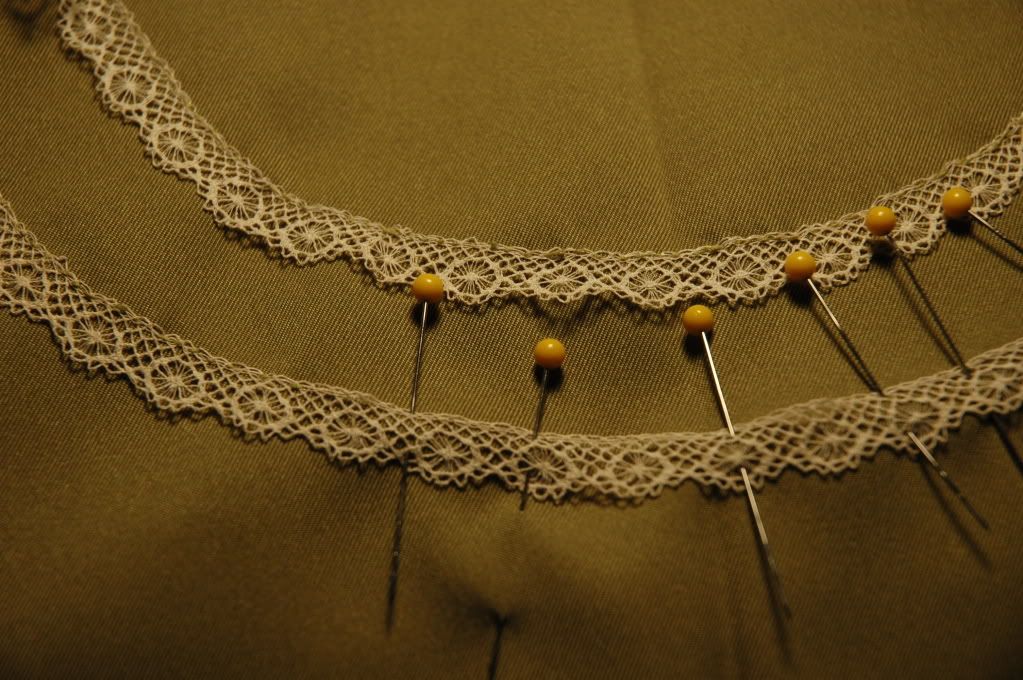
I am not sure how long it will take me with this dress, but I am estimating about two weeks. This lovely pattern calls for two lace inserts at the collar, and believe me, it was hard to find some lace that I liked, as most lace does not suit me. (I don't know what it is about flowers and lace. I suppose I am a simple maid. lol.) But the lace I did find in my stash is quite petite and very lovely. I estimate it is around the mid 40s-50s, but I could be wrong!
I will be posting work-in progress photos as I go along, so please keep checking back for the details!
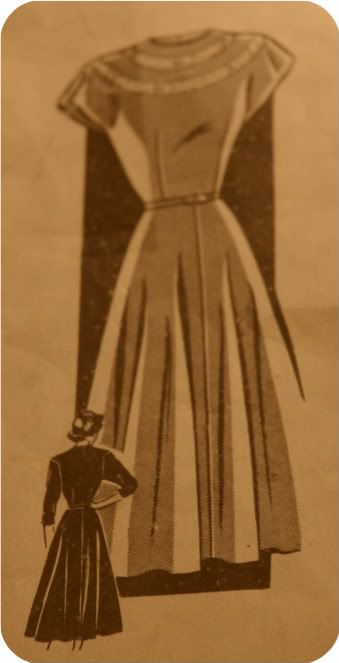
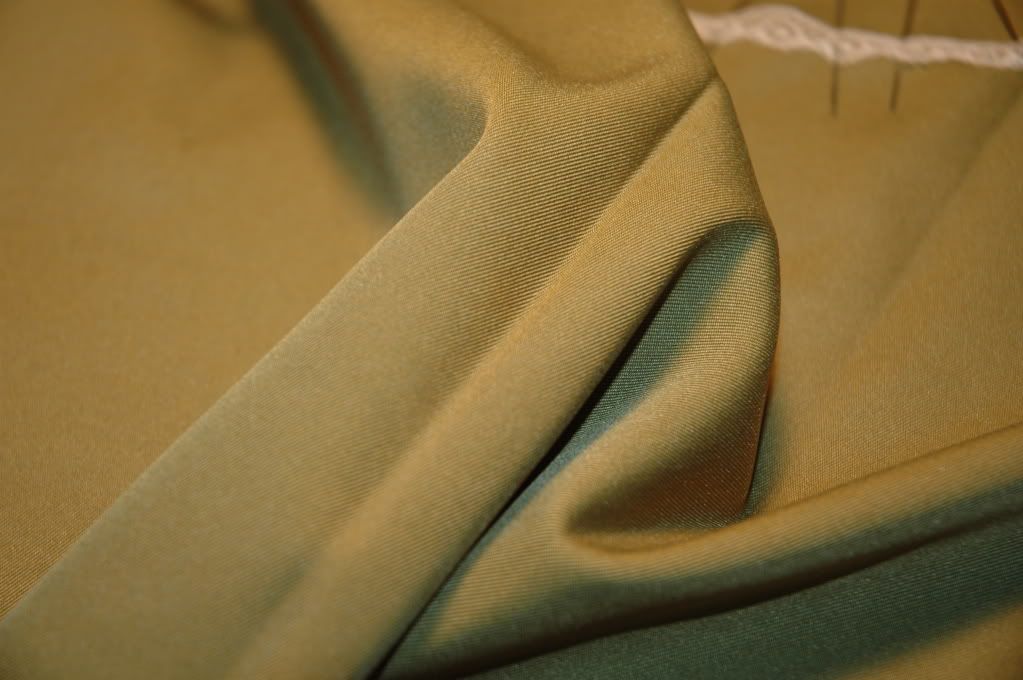
The dress I made for Casey's Swing Dress Sew along turned out so well, I thought I would make another dress. This one is from the mid-40s with almost the same styling, without the buttons. I made an unexpected trip to Joann's the other day, and found some very nice avocado swingy polyester blend fabric. Joann's was having a huge sale, and I bought all of the avocado green they had, and still have some left over to make a skirt if I want!
I am not sure how long it will take me with this dress, but I am estimating about two weeks. This lovely pattern calls for two lace inserts at the collar, and believe me, it was hard to find some lace that I liked, as most lace does not suit me. (I don't know what it is about flowers and lace. I suppose I am a simple maid. lol.) But the lace I did find in my stash is quite petite and very lovely. I estimate it is around the mid 40s-50s, but I could be wrong!
I will be posting work-in progress photos as I go along, so please keep checking back for the details!
Thursday, March 3, 2011
Sew Along Dress -- Button Holes!
Ta da! My button holes are d o n e. I am really excited - I will be posting completed photos this weekend. My 1965 Kenmore Sewing Machine came to the rescue and the button-hole attachment the machine came with worked beautifully. (Although I have to whip stitch a few button holes; not sure what happened with the thread. When I seam ripped a line through the middle, the button holes looked awful. Eh, I'm sure that has happened to a few of you.) Considering my very first sewing project, I think all went well. Here are a few sneak peak photos of the button holes before they were opened. Please keep in mind that I have to remove one of the buttons and re-sew because it isn't exactly straight. Oops - eh - mistakes happen.


- the pattern - 1949 - mail order

aren't they beautiful??

buttons finished w/ the button holes

lefty's slightly too close - must mend
(already? the dress is fresh!) lol

sloppy button holes -- but they looked so pretty before I separated them! Not sure how to fix this problem.... I was so careful
Tuesday, February 22, 2011
Swing Dress Sew Along Part 8 - Setback
My dress is nearly complete - with the button holes left to make, and the buttons to be sewn on. After trying it on to see how all would fit, we discovered something: 1. there needed to be darts in the back bodice because it sat a little tight where it shouldn't; 2. after Mom pinned the darts into place, I could not get the dress off without removing four of the pins that were in place of buttons; 3. this was not a good turnout.
Oh please do not get me wrong! I adore this dress - it fits me very well, better than I could ever have imagined. But after making 19 attempts to fashion button holes on scrap fabric I nearly gave up out of frustration of having loppy button holes! We then decided to see how many button holes we actually could get away with not using. Then came the problems outlined above. :} 'Tis the problem many ladies have -- not enough waisties and too much hipsies. (I must owe that statement to Casey from Elegant Musings for her recent sdsa post she almost labeled "What's in its pocketses?")
Ah. So out of sheer "What are we going to do?", we put the dress away for tonight, and are prepared to tackle it again tomorrow. Next in hope of rescuing this dress so that we can put in a side zipper - yay! the 40s look totally! - instead of all those button holes. The pattern calls for a button under the arm pretty close to the armpit, which would make it uncomfortable for the arm resting against the side. Thus, buttons are out, at least for the side. We are still going to put buttons on the shoulders and mock buttons along the top side (waistband area) but trying to do a side zipper. This will require some reconstructing, and taking out almost an entire side seam!! Eh. Well, I'm familiar with that already. lol.
I have taken photos of what's happening so far. I like how the dress is turning out. I like the button idea, too, but for the side seam it's going to be difficult. I hope this sew along is extended another week and a half, because little blunders and troubles along the way sure slow progress. I am hoping, though, to have everything resolved by the weekend. It's still only the beginning of the week!
Enjoy the photos - and the dreary outdoors of February blues. :p


Oh please do not get me wrong! I adore this dress - it fits me very well, better than I could ever have imagined. But after making 19 attempts to fashion button holes on scrap fabric I nearly gave up out of frustration of having loppy button holes! We then decided to see how many button holes we actually could get away with not using. Then came the problems outlined above. :} 'Tis the problem many ladies have -- not enough waisties and too much hipsies. (I must owe that statement to Casey from Elegant Musings for her recent sdsa post she almost labeled "What's in its pocketses?")
Ah. So out of sheer "What are we going to do?", we put the dress away for tonight, and are prepared to tackle it again tomorrow. Next in hope of rescuing this dress so that we can put in a side zipper - yay! the 40s look totally! - instead of all those button holes. The pattern calls for a button under the arm pretty close to the armpit, which would make it uncomfortable for the arm resting against the side. Thus, buttons are out, at least for the side. We are still going to put buttons on the shoulders and mock buttons along the top side (waistband area) but trying to do a side zipper. This will require some reconstructing, and taking out almost an entire side seam!! Eh. Well, I'm familiar with that already. lol.
I have taken photos of what's happening so far. I like how the dress is turning out. I like the button idea, too, but for the side seam it's going to be difficult. I hope this sew along is extended another week and a half, because little blunders and troubles along the way sure slow progress. I am hoping, though, to have everything resolved by the weekend. It's still only the beginning of the week!
Enjoy the photos - and the dreary outdoors of February blues. :p


front of the dress

front bodice

front waistband

seam bias/binding - isn't it pretty? I'd never used bias before!
I have a whole box of vtg binding and not one piece was navy blue!!

back of dress

back bodice

back waistband

skirt - so lovely!

the intended buttons of choice
Sunday, February 20, 2011
Sew Along Dress Part 7: Oopsies!
I would imagine an old wives tale going like this: "When you start to sew, don't be surprised if you make more than one mistake along the way."
Thus it has happened. To me. And I'm so bummed! But at least it is very easily fixable. I was so very close to being done. Mom checked my work to make sure I was going aright with it. She said, "Your side seam is too short. It won't reach all the way around to the waistband."
Well, so I took out the seam and re-sewed. I was off still. Took out that huge long seam again (the one that runs down the skirt!) and re-sewed it. Another huge sigh and maybe a teeth grit; the thread had missed - just missed - the first folded seam. (I had folded the edge to prevent unraveling and was folding it over again to make a sturdier line for buttons.) I ripped it out again, and it's sitting on the sewing desk for tomorrow's fix.
I'm so close to being done it's not funny! I would have had half a dress to show you by now if I hadn't goofed.


Thus it has happened. To me. And I'm so bummed! But at least it is very easily fixable. I was so very close to being done. Mom checked my work to make sure I was going aright with it. She said, "Your side seam is too short. It won't reach all the way around to the waistband."
Well, so I took out the seam and re-sewed. I was off still. Took out that huge long seam again (the one that runs down the skirt!) and re-sewed it. Another huge sigh and maybe a teeth grit; the thread had missed - just missed - the first folded seam. (I had folded the edge to prevent unraveling and was folding it over again to make a sturdier line for buttons.) I ripped it out again, and it's sitting on the sewing desk for tomorrow's fix.
I'm so close to being done it's not funny! I would have had half a dress to show you by now if I hadn't goofed.


my perfect square neckline stitches -- I'm excited b/c this was a hard part

side seam on the dress -- where the buttons will go; I don't think this is the goofed part

folding over a seam a bit to prevent unraveling

~ buttons are only on there to "show" you what it will look like! Not to that part yet ~
Sunday, February 13, 2011
Sew Along Part 6 - The Machine & Bodice Sewing

This is my mother's vintage 1950s era Necchi Sewing Machine. Italy made! It's very sharp and sews superbly. There's tons of attachments for all kinds of fancy embroidery. Some day I hope to try them - but for now, it's the simple sewing I shall do. (I was not able to use my 1960s sewing machine because this one was already plugged in, and our dining room already has a piano, a large dining table, and two sewing machines .. it would have been a horrible mess to plug in the 1960s machine.) That's ok, I am enjoying this Necchi - wish you could see it in person!

* First Photo*
Sewing the top button closure for the first side button. This was interesting to do, since I had to rip out the seam because it was sewed on the wrong side! It was rather peculiar, too, since the pattern could have already had the side piece drawn into the pattern itself. :) It was an extra step that could have been avoided if the original drafters had thought of simpler ways to construct this -- as said by mother. lol and I happen to agree.
*Second Photo* Hemming along the correct side (button closure).
*Third & Fourth Photos*
Inside front and back facing. Trial and error the first time
Inside front and back facing. Trial and error the first time
with the back facing; accidentally sewed it to the front
instead of the back! :p A seam ripper becomes
the seamstresses' friend. More later.....


Wednesday, February 2, 2011
Sew Along Dress part 4 - Tracing is a Fine Art

Tracing a vintage pattern is not hard - it's the handling of the thin crepe that's hard! I used whatever I could find in the "junk" drawer to stabilize my pattern to the paper without ruining it. The vintage patterns are so much different than today's. Perforation holes to mark pattern pieces, gathers, tucks, measuring... at least the instructions are easy to figure out. :)


Sunday, January 16, 2011
Dress Making Part 2
All right. I'm back to the fabric drawing board. My green fabric, although very pretty, is too thick for this type of dress. I had an inkling that it was, but I was so happy to have found green fabric that I didn't want to face the facts of the thickness of fabric.... sigh.... Here are a few more fabric selections.
 I am thinking that this will come acros as too "grandma-ish" and perhaps look like it should be an apron! This fabric is hard to find coordinating skirt fabric because the "brown" in the fabric isn't really brown nor is it purple. Almost like a taupe, but do not want a lighter skirt color. Any suggestions?

Does this look too '70s? I want the fabric choice to be '40s-style but without large floral patterns. I do not have enough of this fabric to make a skirt, so it would have to be the bodice. Let me know what you think of this fabric.

This fabric is a soft cotton feel. Looks like flannel but it is not. The tiny dark centers of the flowers are blue, so i could have a blue skirt.
I am still not sure if these three fabric choices are the best for the pattern I am trying to make. I am in love with the first option, however, trying to find a coordinate a n d buttons to match will be difficult. If anyone has a place they shop for nice vintage-repro or even '40s dated fabric, let me know -- I would appreciate it so very much! Have a marvelous rest of the Sunday.


Does this look too '70s? I want the fabric choice to be '40s-style but without large floral patterns. I do not have enough of this fabric to make a skirt, so it would have to be the bodice. Let me know what you think of this fabric.

This fabric is a soft cotton feel. Looks like flannel but it is not. The tiny dark centers of the flowers are blue, so i could have a blue skirt.
I am still not sure if these three fabric choices are the best for the pattern I am trying to make. I am in love with the first option, however, trying to find a coordinate a n d buttons to match will be difficult. If anyone has a place they shop for nice vintage-repro or even '40s dated fabric, let me know -- I would appreciate it so very much! Have a marvelous rest of the Sunday.
Thursday, January 13, 2011
Vintage Dress Making
I am preparing to make my first dress from a vintage 40s pattern. This Anne Adams pattern looks very simple. The pattern requires 6 buttons across the shoulders and 4 buttons down the side of the dress. Across the shoulders, I would like to use the yellow geometric buttons, but can't decide which buttons to use down the side. Which buttons do you think look best with this lovely 50s-60s green fabric? (Fabric is true to its color in the first six photos; almost an olive green.)


1949 Anne Adams Pattern

Green Fabric and Buttons to Choose From

Geometric/Thumbprint Yellow Buttons Across the Shoulders/Side

Clear Swirl Buttons Down the Side/Across Shoulders

Perhaps a unique collection down the side?

Yet another collection down the side?

I wonder if this is too "rough" looking?

Tiny buttons down the side...does it work?

Woven leather/type buttons down the side: Brown & Black
Subscribe to:
Posts (Atom)